


 sale




How to Install and Remove I-Tip Hair Extensions

If you’re looking to add length, volume, or a pop of color to your hair, I-Tip hair extensions might be the perfect choice. Loved for their natural look and versatility, these extensions are applied without heat or glue, making them a healthier option for your hair. Let’s break down how to install and remove I-Tip extensions so you can enjoy your gorgeous new look with confidence.
Installation: A Seamless Process
1.Prep Your Hair: Start with clean, dry hair. Brush out any tangles to ensure a smooth installation process.
2.Section Your Hair: Divide your hair into small sections using clips. This helps ensure even placement and a natural finish.
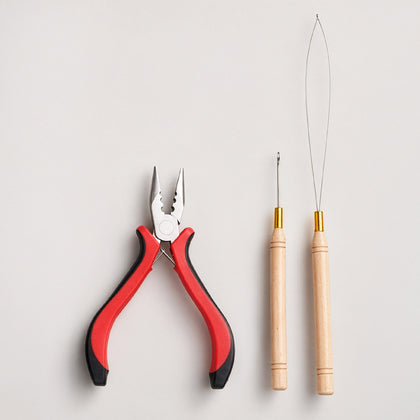
3.Thread the I-Tip: Use a small pulling loop tool to thread a tiny section of your natural hair through a microbead.
4.Attach the Extension: Insert the I-Tip extension strand into the microbead alongside your natural hair.
5.Secure the Bead: Use pliers to clamp the bead flat, securing the extension in place. Repeat the process, working row by row, until your desired look is achieved.
6.Blending: Once all the extensions are in place, trim and style your hair as needed to blend the extensions seamlessly with your natural hair.
Removal: Gentle and Damage-Free
Removing I-Tip extensions is just as easy as installing them. Here’s how it’s done:
1.Locate the Beads: Feel for the microbeads at the base of the extensions.
2.Loosen the Beads: Use pliers to gently squeeze the sides of the bead. This will loosen it without damaging your natural hair.
3.Slide Out the Extensions: Once the bead is open, slide the I-Tip extension out of the bead and your natural hair.
4.Brush and Care: After all the extensions are removed, brush through your hair to detangle and remove any residue. Follow up with a nourishing hair mask to restore moisture.
Maintenance Tips for I-Tip Extensions
-
Avoid Oily Products: Keep oils and heavy conditioners away from the beads to prevent slippage.
-
Brush Gently: Use a loop or extension-friendly brush to avoid tugging.
-
Schedule Touch-Ups: Visit your stylist every 6-8 weeks to reposition or replace extensions as your hair grows.
I-Tip hair extensions are a fabulous way to transform your look while keeping your natural hair healthy. With proper installation, removal, and care, you’ll enjoy stunning hair every day!


Comient (0)
No comments yet. Be the first to leave a comment.
Leave A Comment