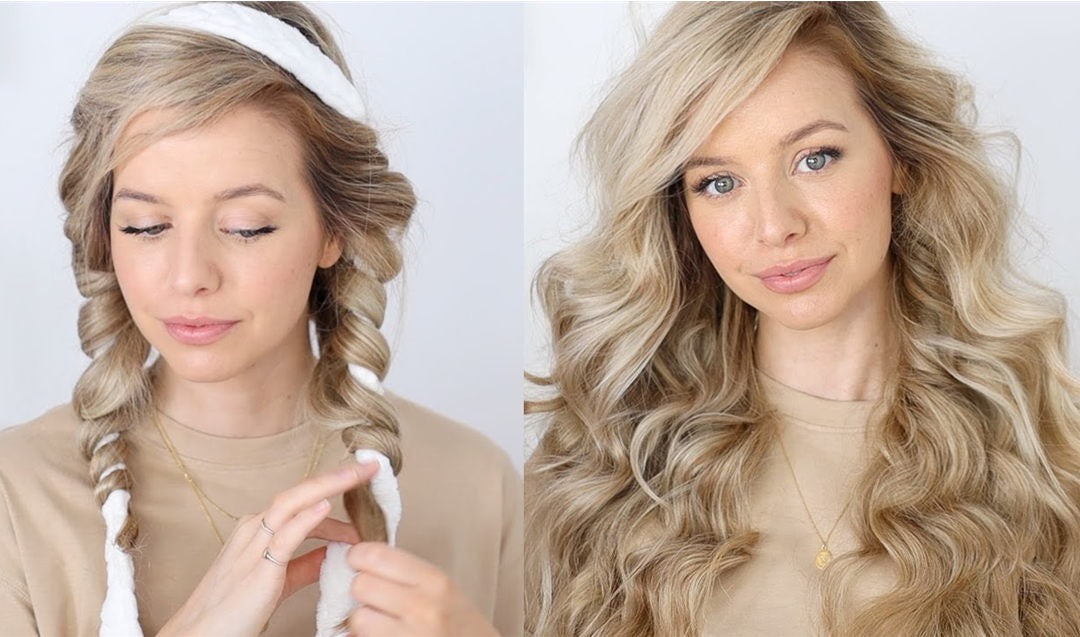
They're so quick and easy. The results are beautiful and there's no damage to your hair. The best part about these curls is they do not require wet hair. if I'm most heatless hair tutorials. It's just going to hold the curl the best all right.
Step 1:
Part your hair where you want to wear it. A deep side part and then separate your hair down the middle in the back, so you have two equal sections and just bring them forward.

Step 2:
Take your bathrobe a scarf some nylons you just want something that is thin and as long or a little bit longer than your hair. Having a more plush robe tie like this will give you more bigger luminous curls versus a silkier one will give you a tighter curls whichever you prefer. Some girls using a long tube socks so get creative.

Step 3:
Lay your tie over at the top of your head so that both sides are equal. Pick a side to start on and you just want to grab like a two to three inch piece of hair right at your part. It tightly pulled this piece of hair back over the tie and then you want to bring it underneath. so it's wrapped around your tie and back at the front so a little something like this.

Step 4:
Grab another two to three inch piece of hair just join it into this previous piece. Then wrap it back and around your tie and you want your twist to sit right below one another so they're touching. Go ahead and grab all the hair that's above your ear join it into that previous section and just wrap it around the time alright. Once you're about here, you want to make sure that you are directing the twist behind your ear and just going to repeat this pattern all the way down and you want to make sure as you're wrapping it that you're keeping it nice and tight.
This is what's going to help give you a nice defined curl and then once you reach your neck you can join it into that final section and you can just continue wrapping all the way down and making sure that your twists are touching one another.

Step 5:
Once you reach the bottom, don't let go. You want to keep this nice and tight and you just want to secure the ends off with a small hair elastic which could be kind of finicky especially if you have like a long road, but it's worth it.
Once secure if it did loosen up, it's all good just give it a little twist away from your face. The tightness is what's going to help create that curl. Since our hair is dry, so give it a little twist alright.
Wrap them. this step is crucial if you don't wrap it, it's going to loosen up as soon as you let go and you'll just have like really soft waves which are still really pretty but the wrapping part is key so just give your hair a little bit of a twist and you just want to wrap it up away from your face. Have it sit right behind your ear, this excess rope part just keep wrapping it around and then take a scrunchie.

Step 6:
Repeat the same thing on the other side. Go get ready. See all in the morning!

Step 7:
Next morning carefully remove your scrunchies first. Then gently unravel your twists. Gently unravel your hair twist by twist. You wanna do it nice and carefully so that you don't create any knots tangles or frizz. Although these are comfortable it feels so nice to take out of your hair. Make your hand into like a clock just carefully and slowly break up all of the curls.
Add a little dry shampoo.


Leave a comment