


I am ready to show you guys how I put in my tape in hair extensions human hair at home all by myself. I had been using a lot of clip in extensions for years I actually have tons of bags of hair extensions. GOO GOO Hair was my absolute favorite.
I found myself in a situation a few years ago. Dating with my husband, we were new to this whole thing and I kept wondering once we got to that point what I was gonna do to explain that I took my hair out at night before I went to bed. So I started looking into tape in extensions and I absolutely fell in love with Goo Goo tape in hair extensions human hair.

I watched a ton of videos and found one that I really felt was the easiest way for me to be able to get the same look that I could spend hundreds of dollars for installation at a salon at home. So stay tuned I'm gonna give you all my tips and tricks for getting that done along with all the supplies you might need to be able to do this yourself at home.
Tools you will need:
Outside of the tape in hair extensions themselves, there's not a lot of things that you're going to need in.
A brush, A comb, Some clips to hold hair back whenever you're not working with that particular section of hair and regular old hair ties. So this is all you need to get started outside of the hair itself.

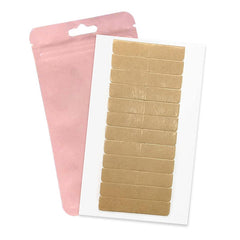
The hair extension is real human hair you can style it, wash it, use heat tools whatever you want to do just like your regular hair. Goo Goo tape in hair extensions come in a ton of different color combinations. The color I used is marked as 4/27/4. It's a blend of colors.
Generally I get three packs of 50 gram hair. One pack of hair that is a couple inches shorter than the rest so that as I'm putting it in everything's not on one length and it helps to graduate the length with both the steps on my scalp and the length of the hair itself . So this one is what I'm going to start with and it's about two inches shorter than the other 250 grams sets.

Step 1 : Wash and brush your hair
First I washed my hair, but I did not use conditioner. It's super important not to add conditioner to your hair especially at the roots before you put in your tape in hair extensions. So I washed and dried my hair with absolutely no product in it . Whatsoever that's also very important so not just the conditioner in the shower but you don't want to put products in your hair before you apply your extensions. So fresh, clean hair washed, dried and then brush it out to make sure that all of the knots are out.
Step 2: Section your hair
The next thing we're gonna do is actually to section off the top part of our hair that has going to have no extensions in it, but the important part about this section is to make sure that we keep enough hair above where we're going to start our tape in hair extensions, so that when we let our hair back down over top of where we apply those extensions we're not gonna see where the tapes are on your scalp.
I generally start above my temple and run my fingers straight back, making sure that I'm staying straight back in the back.
Step 3: Pull your hair up
Pull that hair straight up ,do a little genie bun on the top to keep everything out of the way. Then I'll take my clip and clip it on the top of my head. It is important that you check and make sure that you have a fairly straight part in the back it. Doesn't have to be perfect.
Step 4: Put tape in hair extensions on
Put our extension tapes that are about an inch and a half wide lay them on that line. In order for it to blend well, it doesn't have to be a perfect match . But you don't want one solid color that you're trying to fit into your hair so that's why I like these particular extensions because they're actually super natural when it comes to even how my roots are dark and then it fades into other colors.
On the back of these is a little sticker tops. Underneath this sticker is adhesive which is super sticky and you don't want to touch it with your fingers as much as you can. You're not going to be able to avoid a hundred percent touching with your fingers but you want to try not to touch with your fingers.
What we're gonna do is we're gonna start the placement of this first weft. Take the tape off of the back.
Use this part as my guide for this first row if you watch other videos with other people putting them on, to other people this is a completely different method than that. This is a lot easier and it's one that I have probably perfected a little bit in the last couple years so it's not super easy the first time but it gets easier and easier each time you do it. I like to wear my hair in a ponytail a lot or a messy bun a lot, so I try to put my human hair tape in hair extensions in a way that I am NOT going to be able to see them when I pull my hair up. So I'm careful to leave at least a couple inches in front of my ears. I generally will take that section and then start this tape right above it not all the way at the part but as close to the part as I can. I literally just laid that tape in extension with the adhesive right there . That's half of each one left being put in. so I'm gonna grab my next piece and take the tape off again. Essentially what we're doing with these types of extensions is your sandwich a fine layer of your hair between these two tapes. Here's the trick to doing it yourself so we're gonna take this tape that I just laid onto that hair and lightly lift it up. When I lift it up it's taking that fine layer of hair that it attached itself to and it's lifting it up with it. I am going to take this with the adhesive face up lay it directly under that tape and then just flip this one back down on top making sure that the twos ends meet press them together lightly with my fingers. That is my first weft place so another thing that I do and this is up to you whether or not. It does definitely help them to stay in a little bit longer I take an old and I say old because sometimes we will get adhesive on it. I take an old junk straight straightening iron and I just really quickly touch it clasp it between the straightening iron to kind of warm up that adhesive. It helps it to really set in there so it is literally that easy you're gonna place a couple.

Leave a comment